5-Bar Linkage Desk Light
In a few days I will move into my new dorm room on campus for the first time. I’m planning on bringing my desktop computer with my new monitor stand and two monitors. I did notice in an earlier tour of the dorm that the single ceiling light isn’t that bright and I don’t get much light on my small desk when I’m sitting down. I don’t exactly have enough room on my desk for a standalone desk light, so I decided to make one that integrates into my monitor stand. Since there is a strong steel pole in the center of my monitor stand, there is already an easy mounting point.
I knew that I wanted something adjustable that I could move in and out depending on what I’m doing at my desk. I looked all over the internet for design inspiration by looking at desk lamp ideas, but I wasn’t satisfied with any of them. While they were all adjustable designs, I did not like how they all relied on either springs, friction hinges or both. There were a couple other designs that mounted directly on to the tops of monitors, but they did not offer a great deal of adjustability. Another reason I needed a lot of adjustability is because I sometimes have two 24 inch monitors side by side or three monitors with a huge 32 inch in the center and the 24 inch monitors vertically on the sides. Since I couldn’t find any designs that I was satisfied to base my design off of, I had to come up with something completely original. I’ve always been fascinated by complex linkages, so I decided to give it a go.
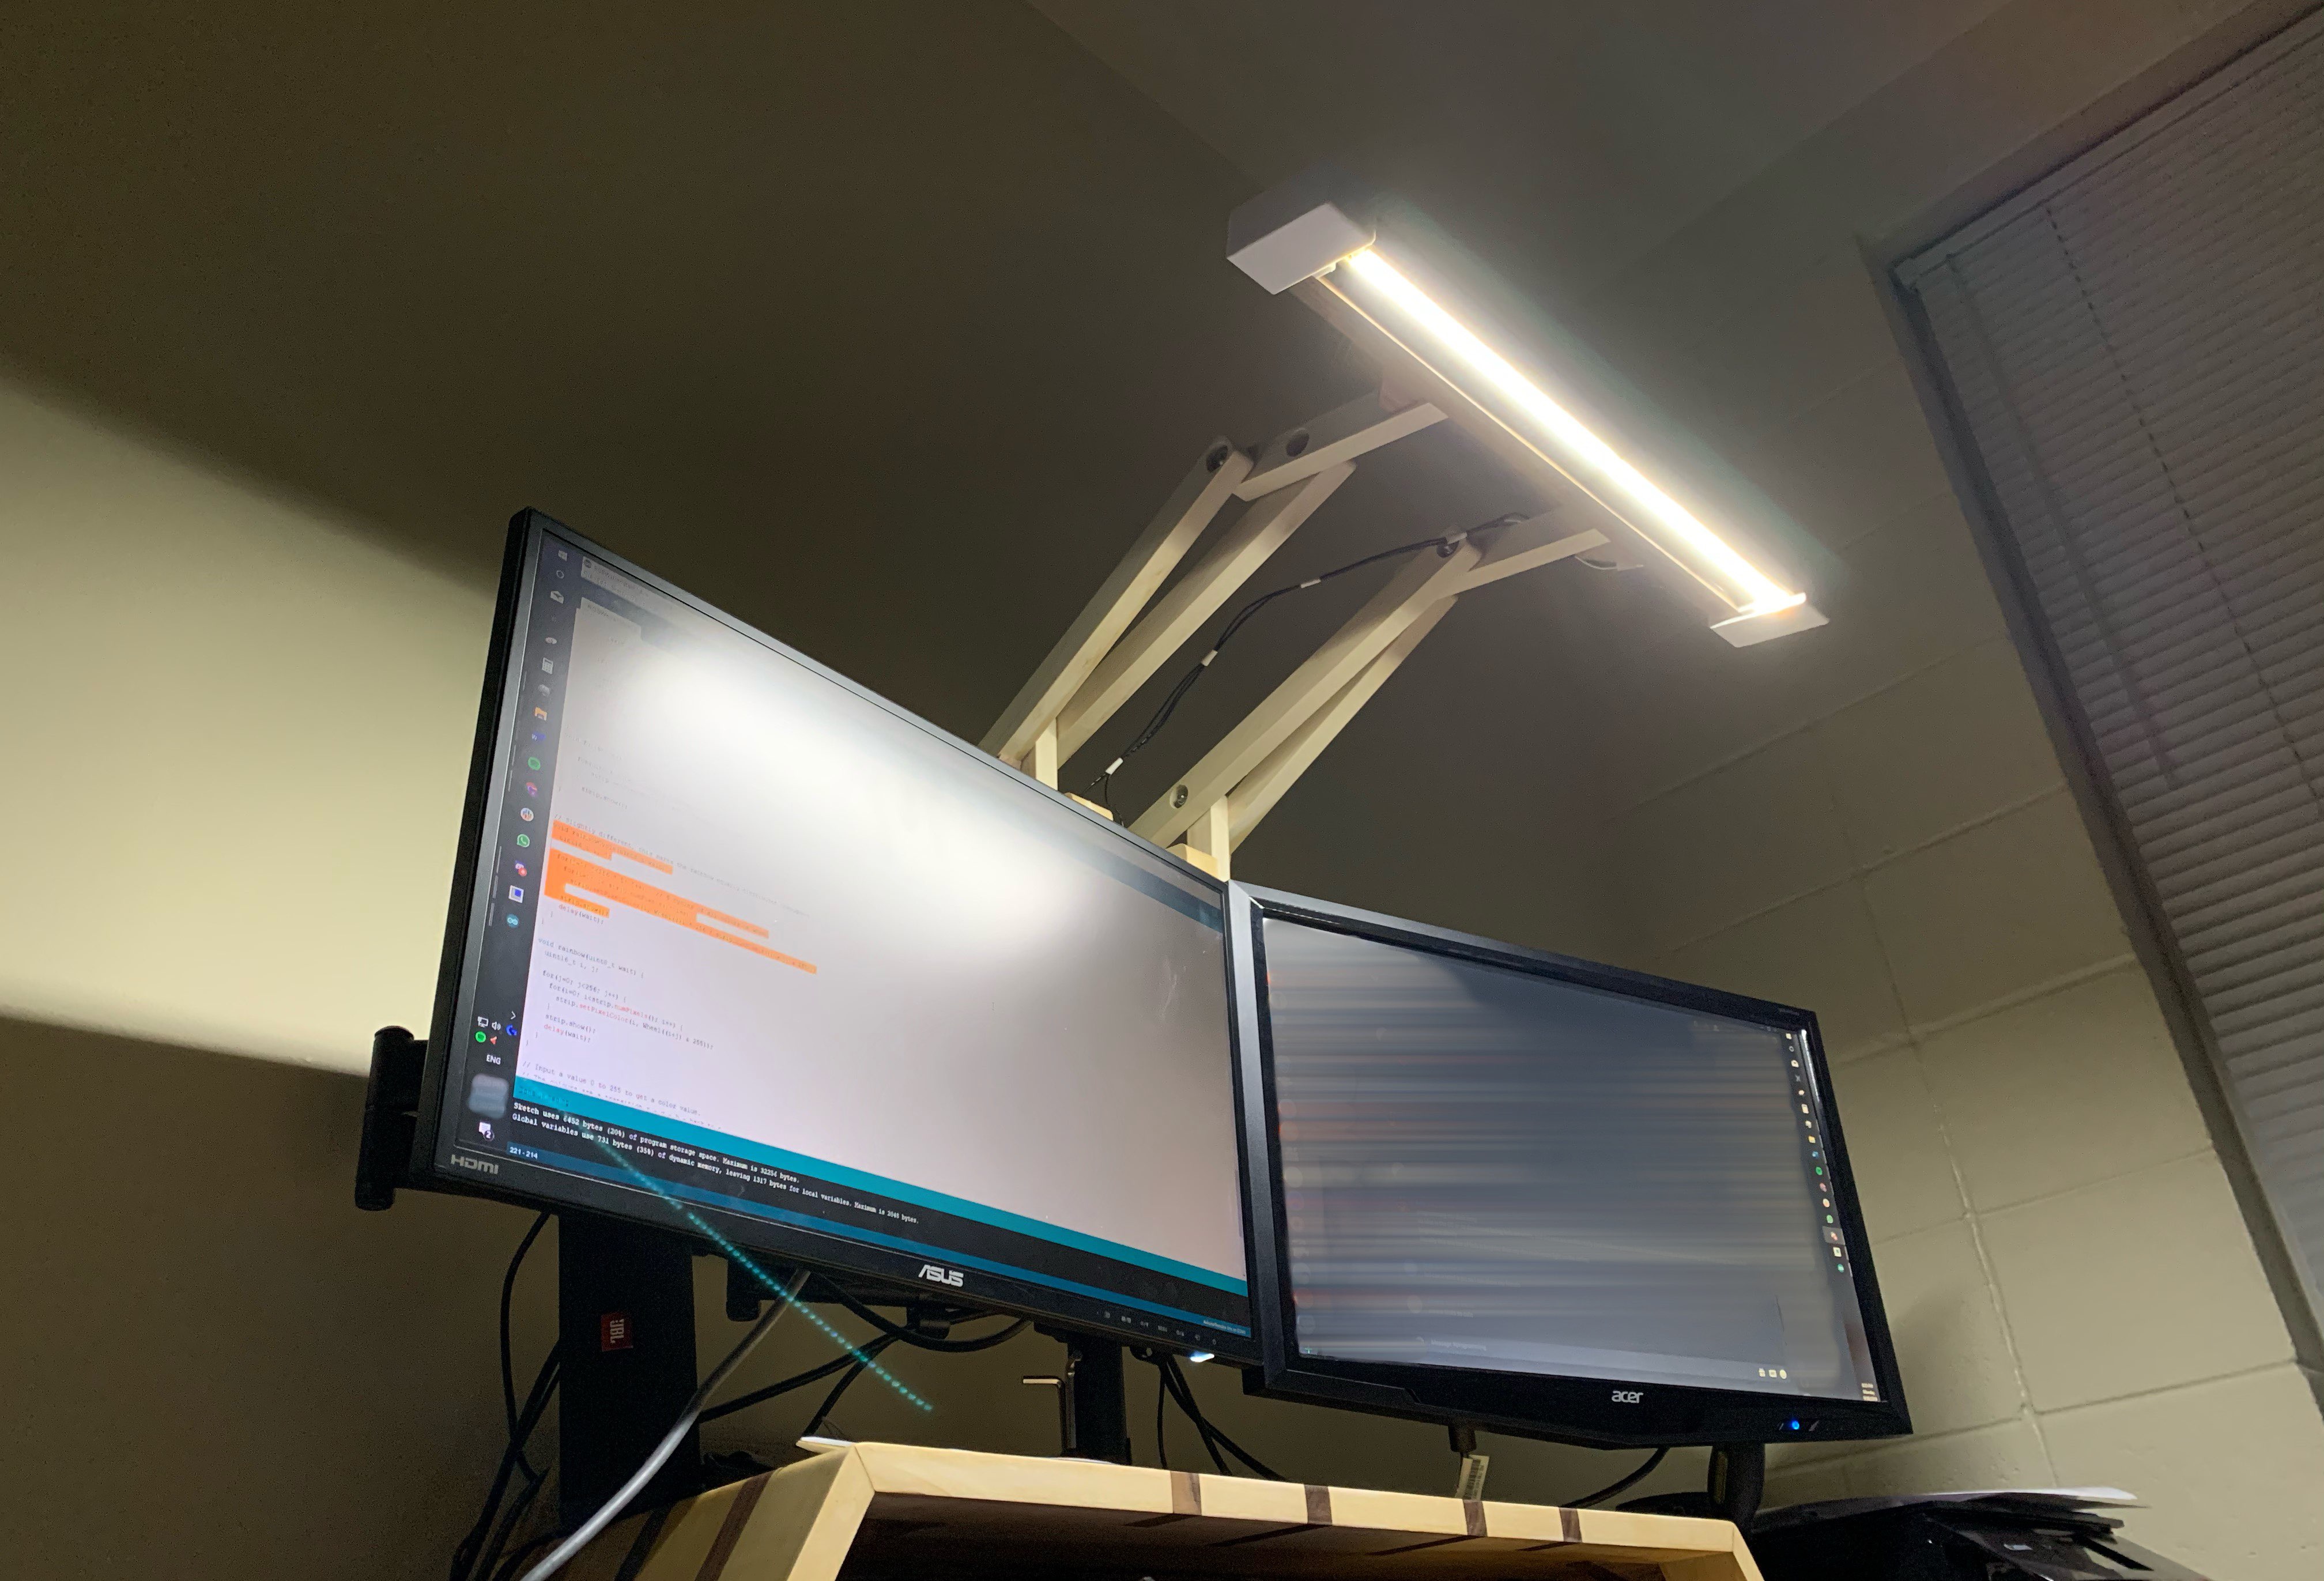
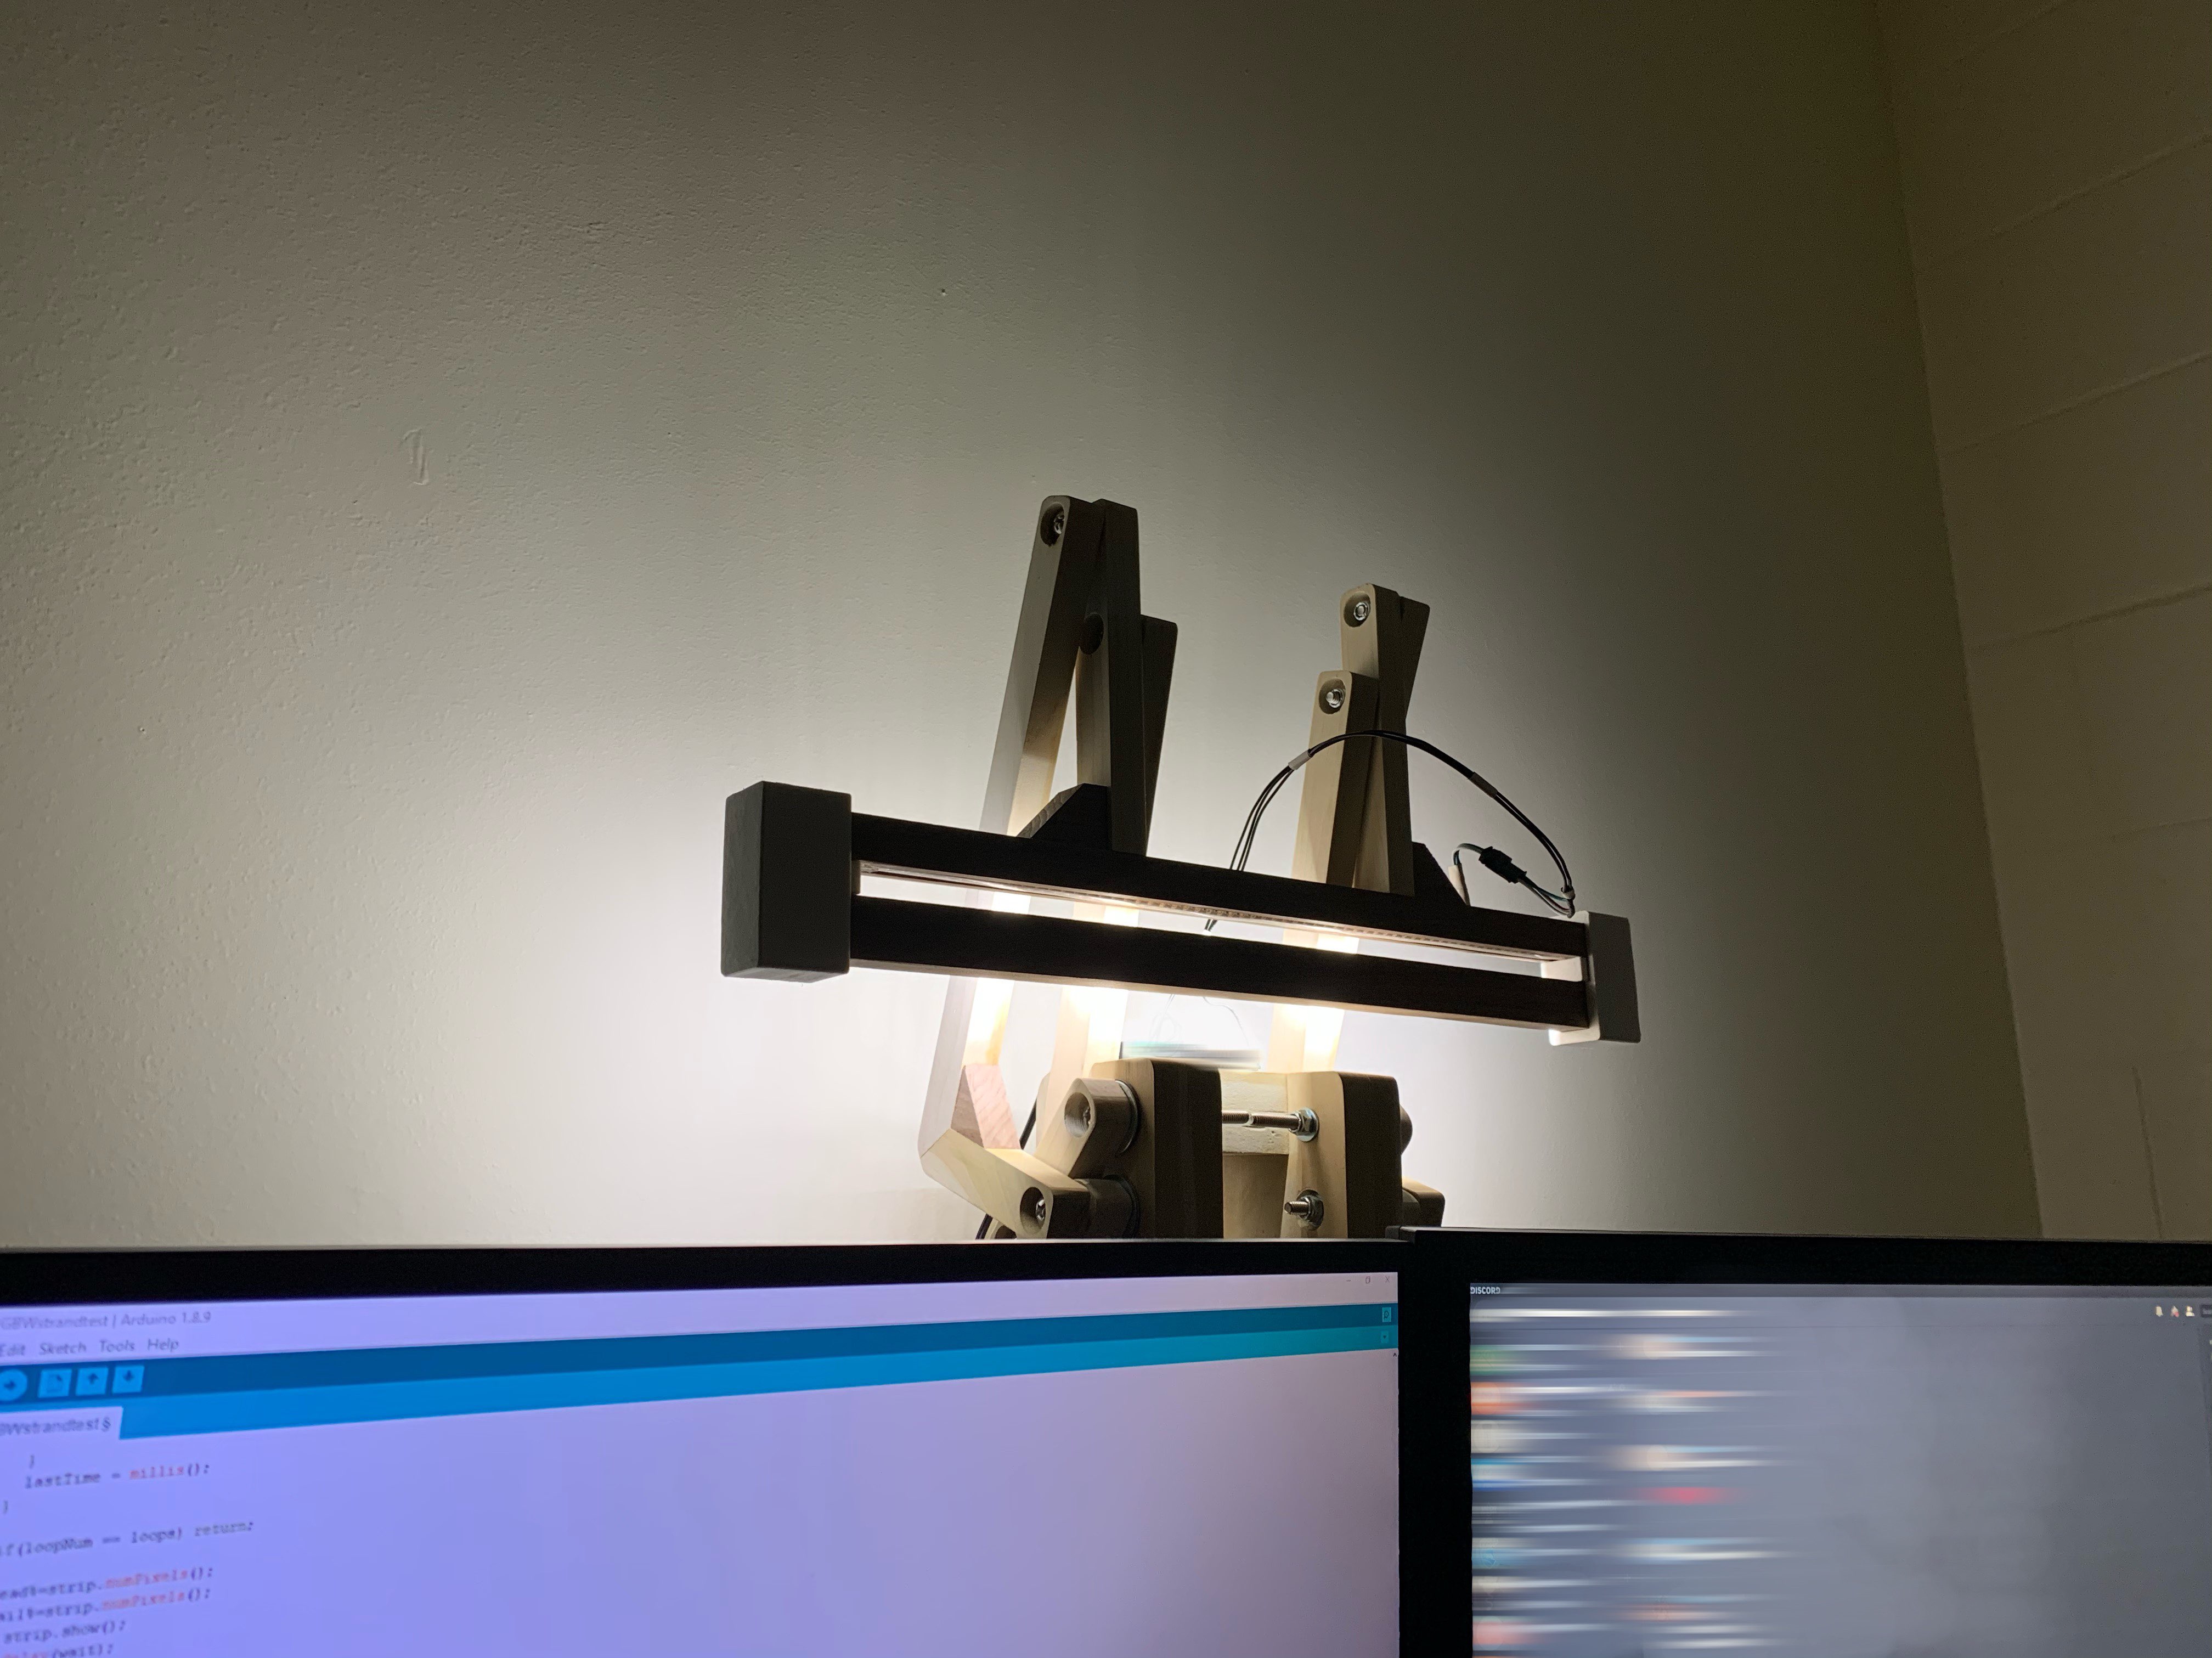
My main optimization goal is to get the most compact dimensions to extend the end of the light fixture 15 inches out and have some rotation. I determined 15 inches away from the monitor as the optimal distance to not get light glare in either my eyes or monitors. Coincidentally, 15 inches also happens to be about the halfway point between my eyes and monitors. This is extremely important since I plan on using bright high density led strips. The rotation is also important since I don’t want the light to be shining directly downwards in my direct line of sight when fully retracted. That way I can keep my light on even when not in use and still light up my room. With those two design requirements, I set off to linkage design land.
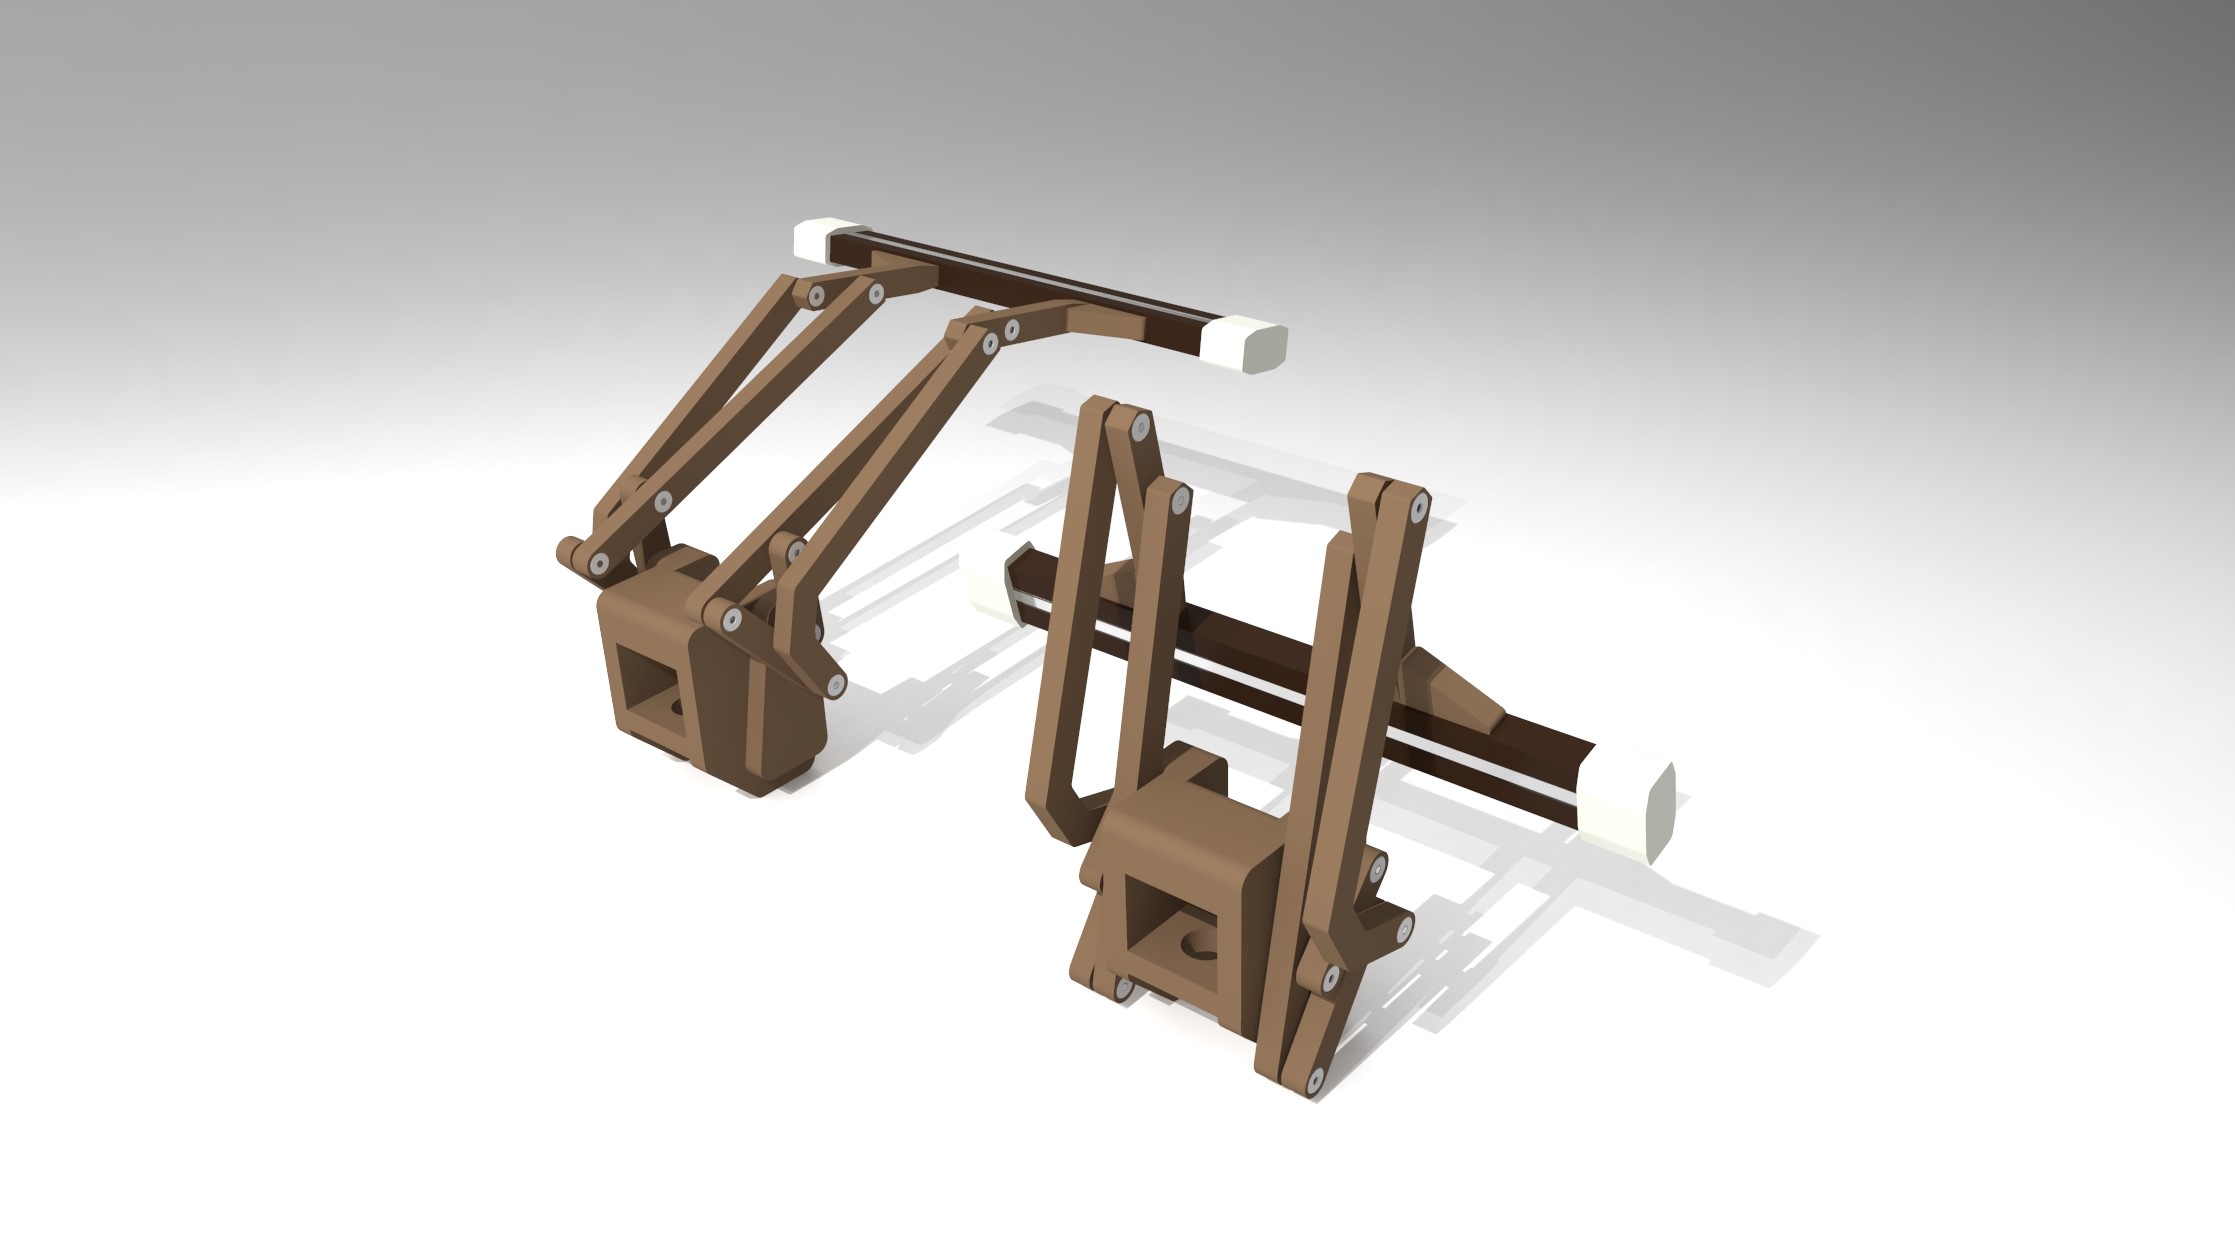
I downloaded a linkge design and simulator software to aid in my linkage design. I mainly used the software to quickly test many different linkage layouts and dimensions. After attempting for a couple minutes with 4-bar linkage geometry, it was clear that I had to step it up to a 5-bar linkage to meet both of my design requirements. 5-bar linkage design was much more complex than the more predictable 4-bar linkage design and I admit there was a lot of trial and error involved to get what I wanted. The software did speed things up significantly and it would have taken me days instead to try and design the linkage using other methods.
With the linkage dimensions in hand I started on CAD in Creo Parametric. I needed to make sure there was no interference in the 2D linkage design with real 3D world geometry. I could also get a preview of how the desk lamp would look mounted to my monitor stand.
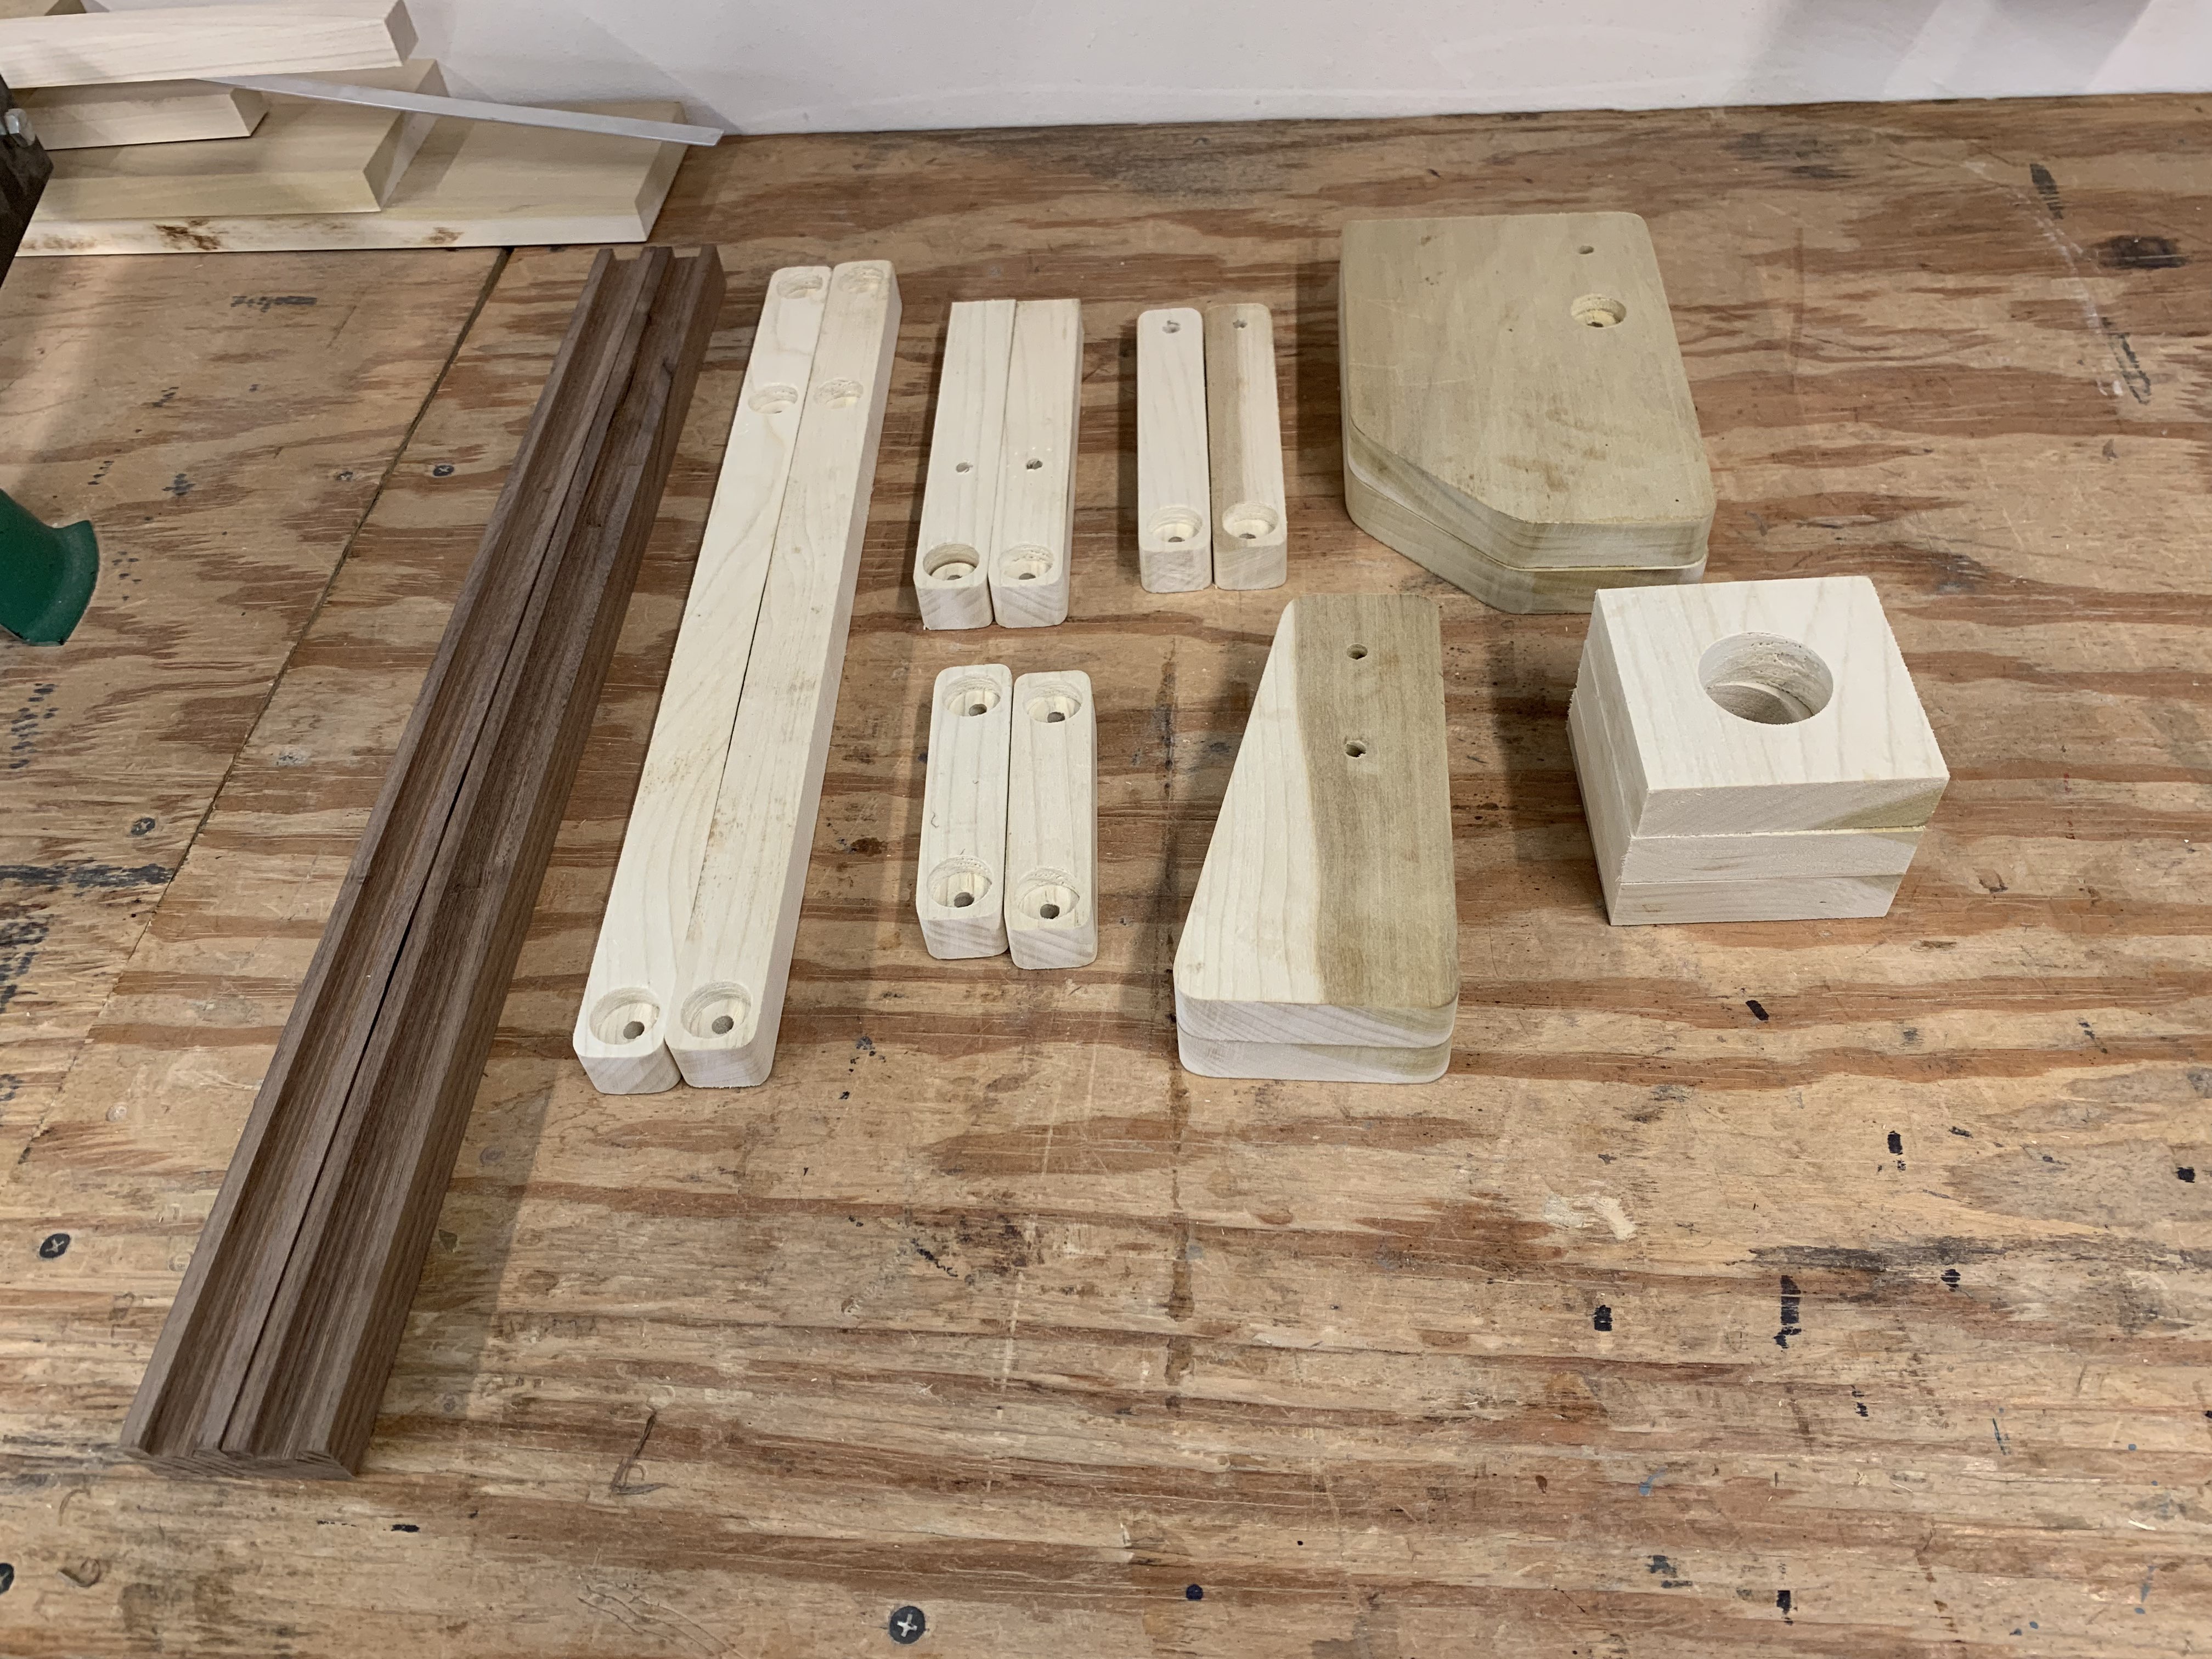
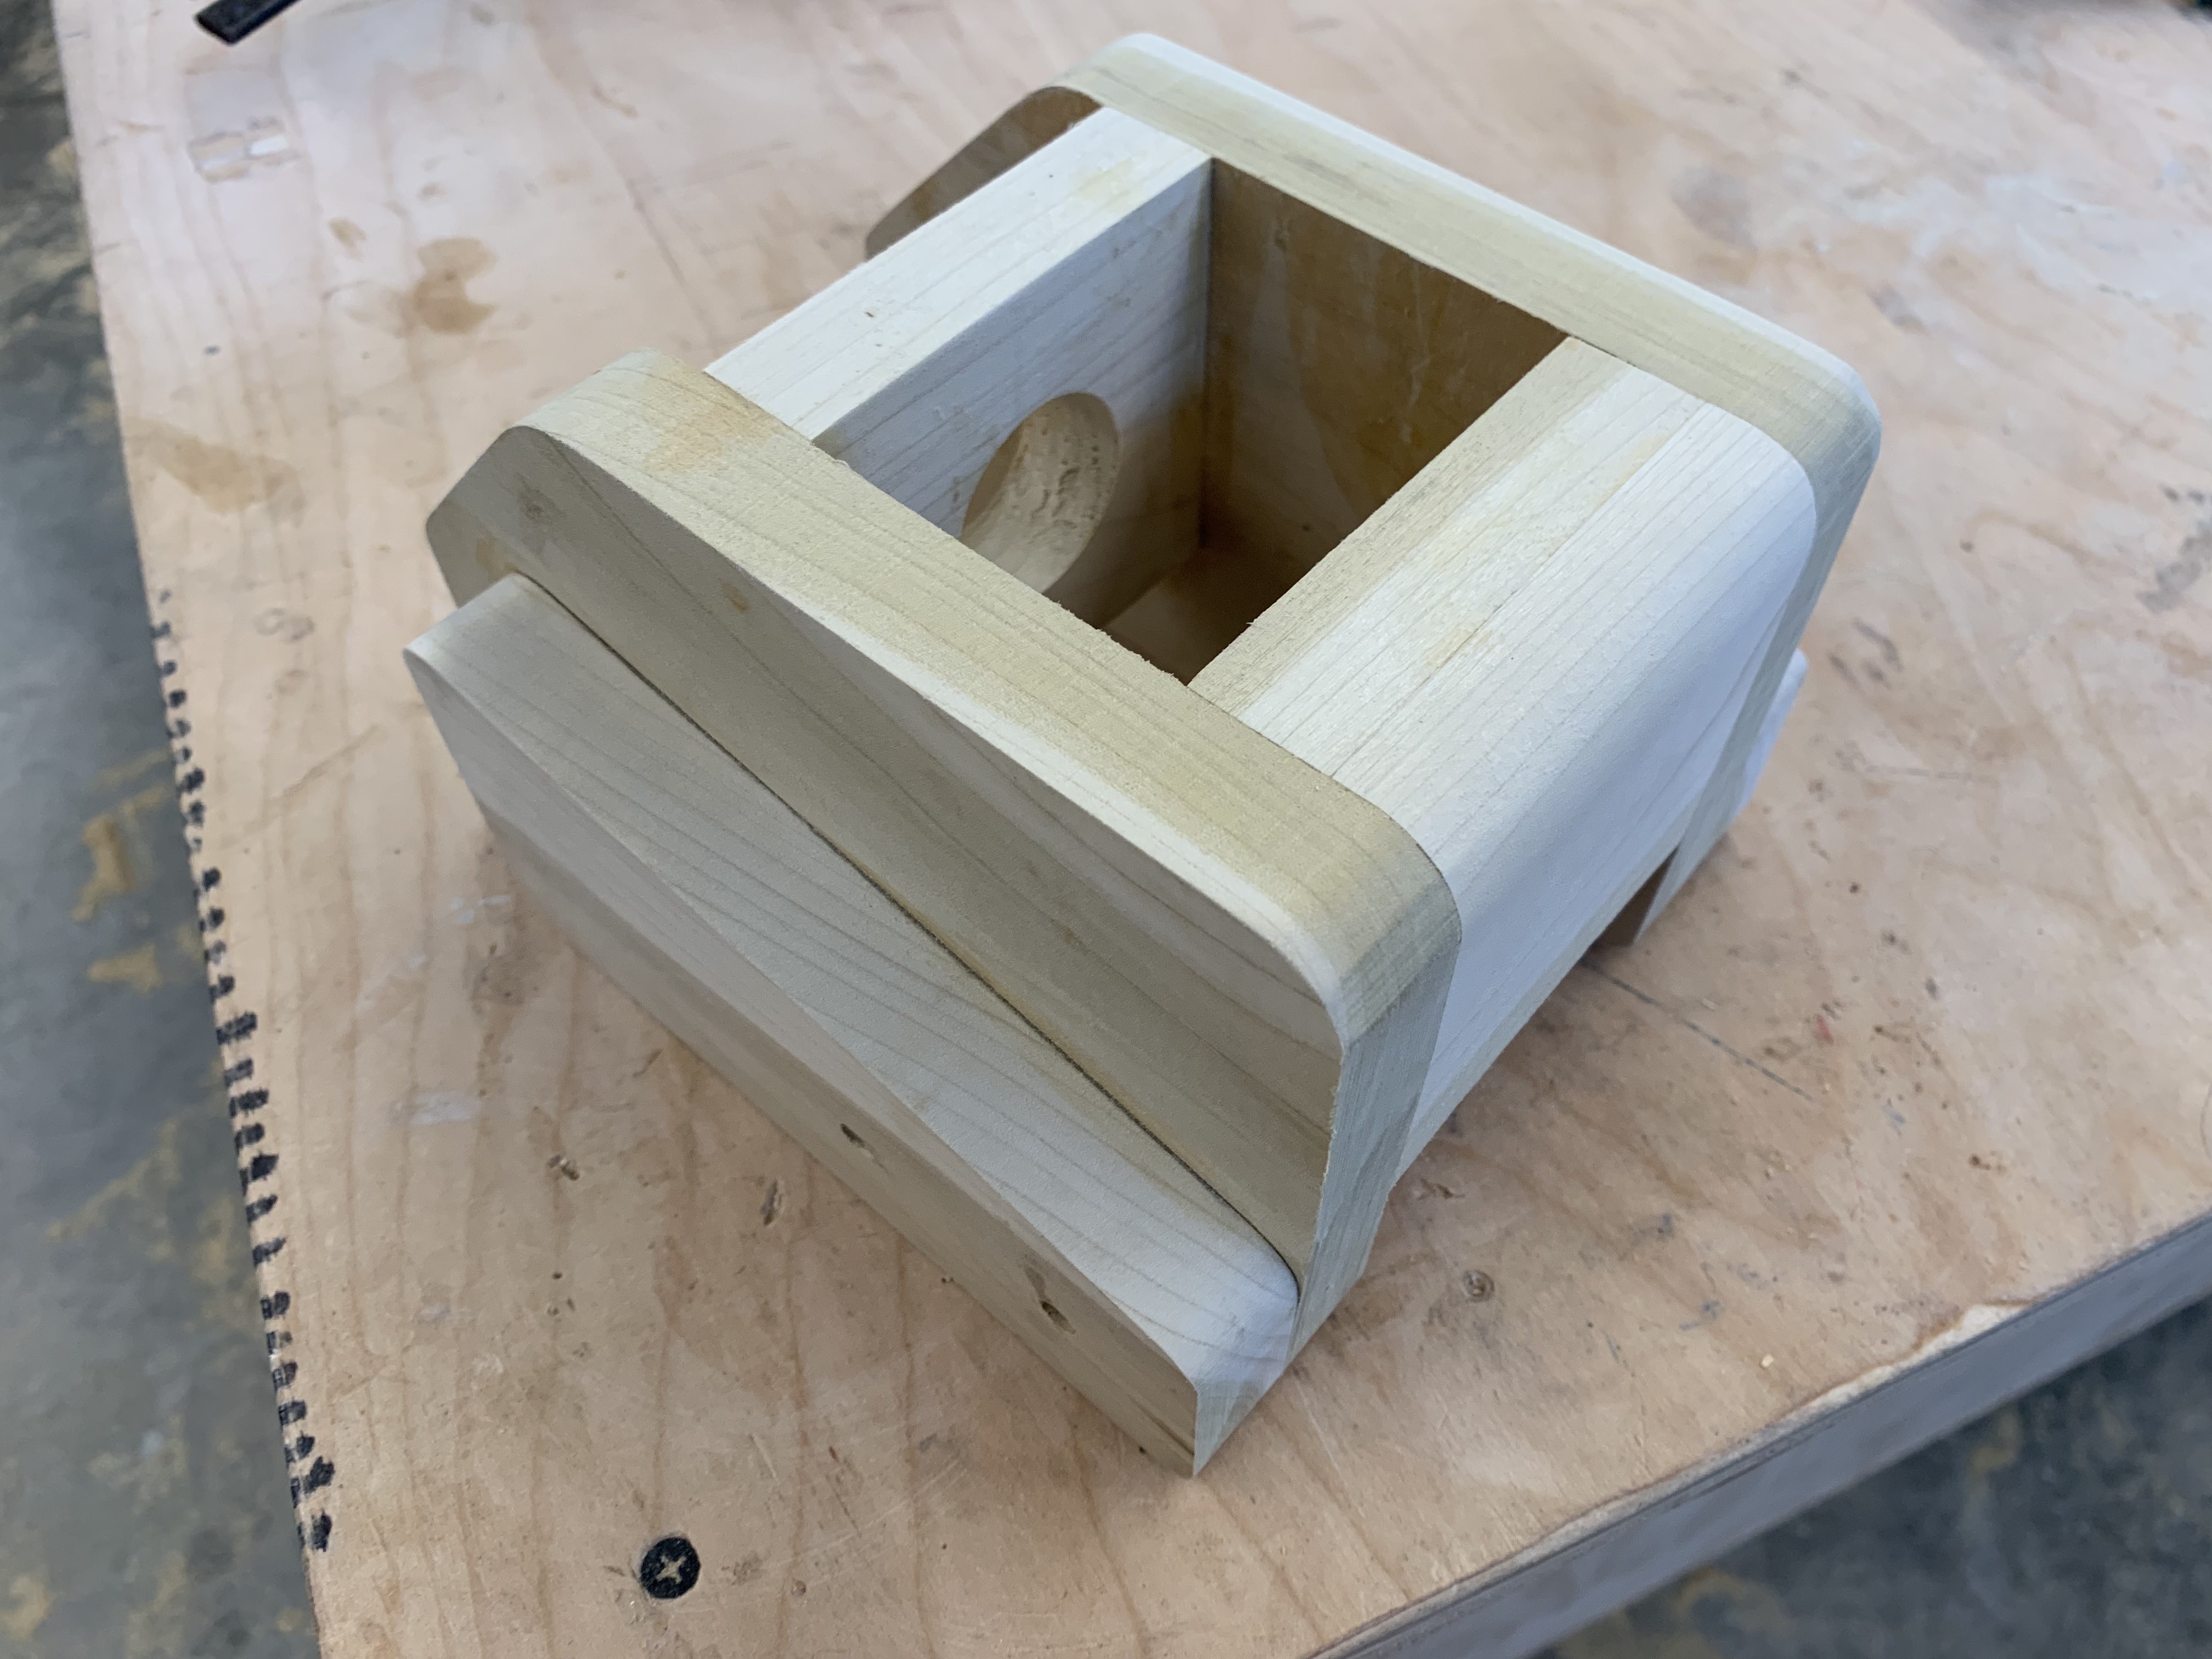
I had some bits of left-over poplar and walnut from my previous monitor stand project, so I decided to keep my light and dark wood theme and use it. I used a table saw to rip the boards into 1 inch strips and cut a channel in the walnut strip for the led strip to nest in. A vertical band saw was used for the section and angles cuts. The drill press was used to drill ¼ inch holes for ¼-20 hardware and counterbored with a forstner bit to keep things flush. A belt sander smoothed out all of the rough surfaces and rounded the edges. While I had access to an entire wood shop at the time, I’m more than certain this entire desk lamp can be made with a simple hand saw and drill, albeit with a little more effort required.
The base that attaches the lamp to the monitor stand consists of a couple blocks of wood glued together. There is also a little slot for a led controller and power supply. I used an arduino to control my rgbw strip at first, but I quickly replaced it with a bluetooth led control module that I could adjust with my phone. I liked being able to program my own light effects through the arduino, but it was too much of a hassle to make adjustments. As for the power supply, I found a laptop charger with appropriate voltage and a little more than enough current specifications.
After finishing the build and testing the linkage for the first time in real life, I discovered that the linkage has a balancing point near its midpoint travel position. I had originally intended for the lamp to rest at only the fully retracted and extended position, but I like this mid point position for if I am really focused and sitting closer to my monitors.
I am extremely satisfied with this project and how it turned out to be a useful piece of technology. This project shows that there are many ways to make something as simple as a desk lamp. A future upgrade to this desk lamp is to add a motorized retract and extend feature with the click of a button.
Skills Enhanced
- CAD (PTC Creo Parametric)
- Linkage Design Simulator