Electric Skateboard V1

After a few months indoors in quarantine, I wanted to start a new project and hobby. I knew that I wanted to build an electric vehicle that I could ride on and use around campus. My two options were to build an electric bike or electric skateboard. I can already ride a bike, but I can’t even step on a skateboard without losing balance. However, I have the entire summer to learn how to ride an electric skateboard in the comfort of my own neighborhood before I move back to campus. Plus a skateboard is much more convenient, since I can just bring it with me into buildings instead of locking it up outside. It was settled, I was going to build an electric skateboard and I just got CNC router access so I want to utilize it.
The first thing I had to do for this project is to determine what parts I needed and order everything. Aside from the parts that go into a regular skateboard such as the deck, trucks, wheels and bearings, some other parts are needed to turn it into an electric skateboard. Those extra parts to convert a regular skateboard into an electric skateboard are the battery, electronic speed controller, wireless remote receiver, and motor assembly. I chose all of the parts to suit my low skill level and relatively low budget. Since I don’t think I’ll be going that far or fast, I chose to get a small 6s2p li-ion battery pack. The term 6s2p means that the battery pack has 6 battery cells in series and 2 battery cells in parallel. Since there are 6 cells in series and each cell has a nominal voltage of 3.6v, my entire pack has a nominal voltage of 21.6v. A small battery means that it will also be lightweight which is important for portability. The next part is the electronic speed controller or esc for short. The esc is responsible for converting raw battery electricity into controlled electricity to power the brushless motor. Esc’s are rated for a maximum input voltage and maximum output current. More expensive esc’s can accept higher voltages and output higher current to the motor, resulting in more power being able to be delivered. I got a fairly low end but reliable esc, since my battery has a relatively low voltage and I won’t be pulling much current out of the small battery. The wireless remote receiver plugs into the esc and tells the esc how much power to send to the motor through ppm signal. The last electric part added is the motor, which attaches to the trucks with a motor mount and to the wheel through a pulley system. A dual-motor drive costs significantly more than a single-motor drive, since adding another motor also means getting an extra esc and extra set of belts and pulleys. I got a single 6374 brushless motor. Skateboard motors follow a general naming scheme that starts with the motor diameter in millimeters followed by the motor length in millimeters. That means that the motor I got has a diameter of 63 millimeters with a length of 74 millimeters. With all of the parts ordered, I had to wait until everything arrived before I could move on to the rest of the design.
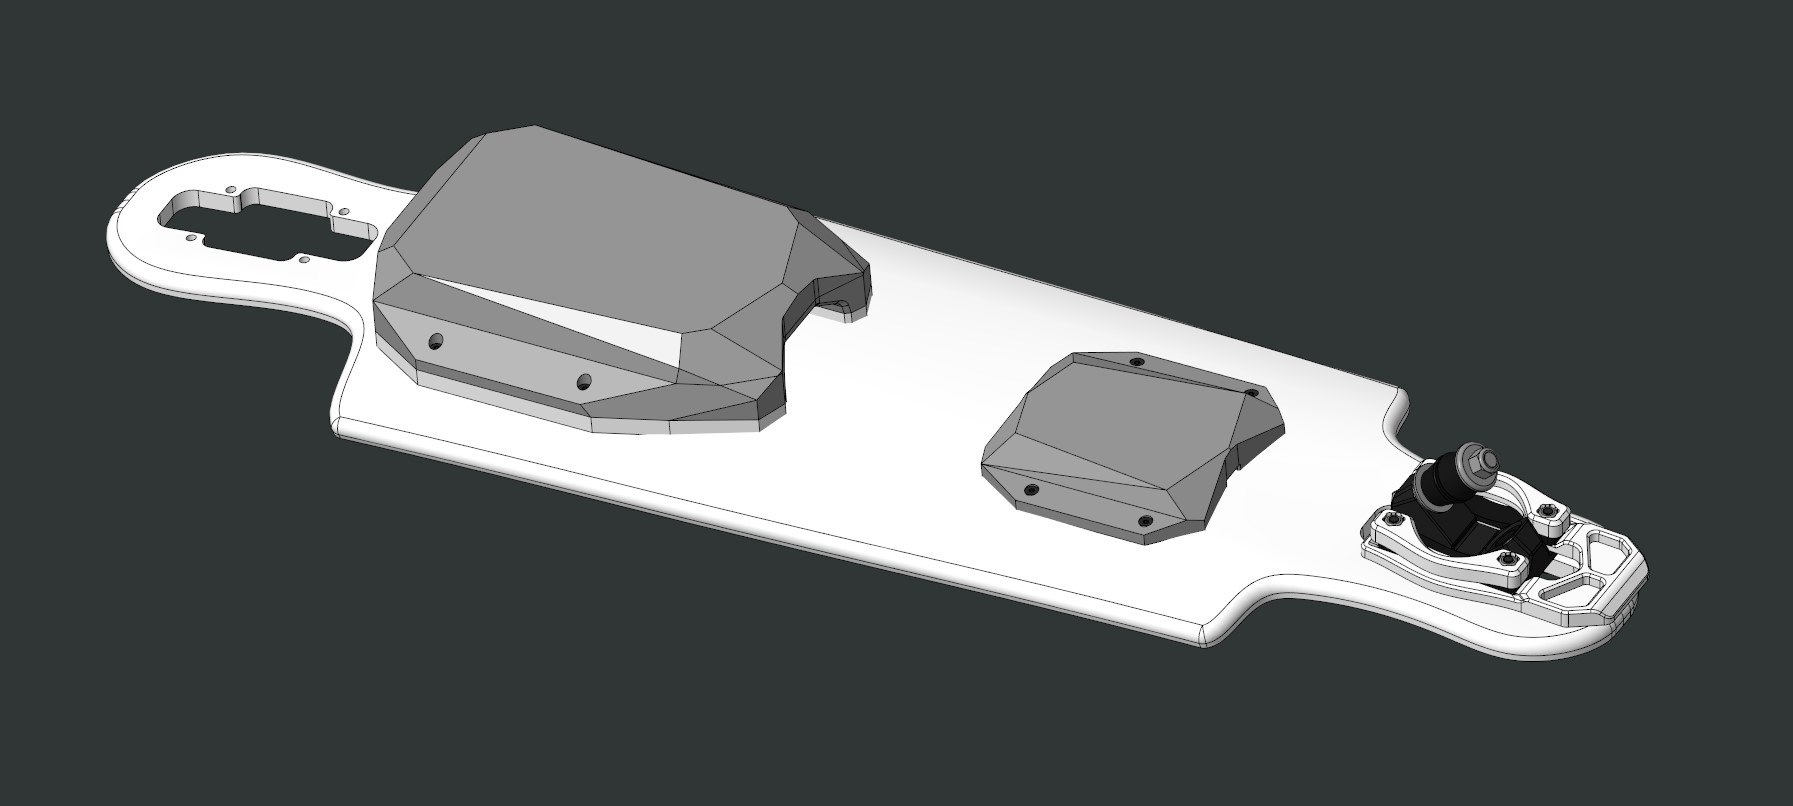
Like most of my projects, I have to bring all of the parts into CAD to layout and plan everything. I started all of the CAD after I had all of the parts on hand to take real dimensions and make CAD representations. The only thing that I had to design is an enclosure to protect and attach the battery and esc to the deck. I decided to separate the battery and esc enclosure similar to how Boosted Boards separate their enclosures. Separating the enclosures would mean I could have two smaller sections instead of a single longer enclosure. Since I am using wood as the enclosure material, I wouldn’t want a long enclosure that might crack when the deck flexes. I also integrated a little grab handle on the battery enclosure to hold on to when carrying. The power button is built into the handle, so I can easily turn it on or off when carrying the board.
Before being able to machine the enclosures on the CNC router, I had to create some g-code in a computer aided machining (CAM) program. G-code is a string of commands that the CNC router reads to execute movements and actions. A CAM program is needed to generate g-code from toolpaths. Toolpaths are where the cutting tool moves to cut the part out of a piece of stock material and are determined by the CAD model geometry.
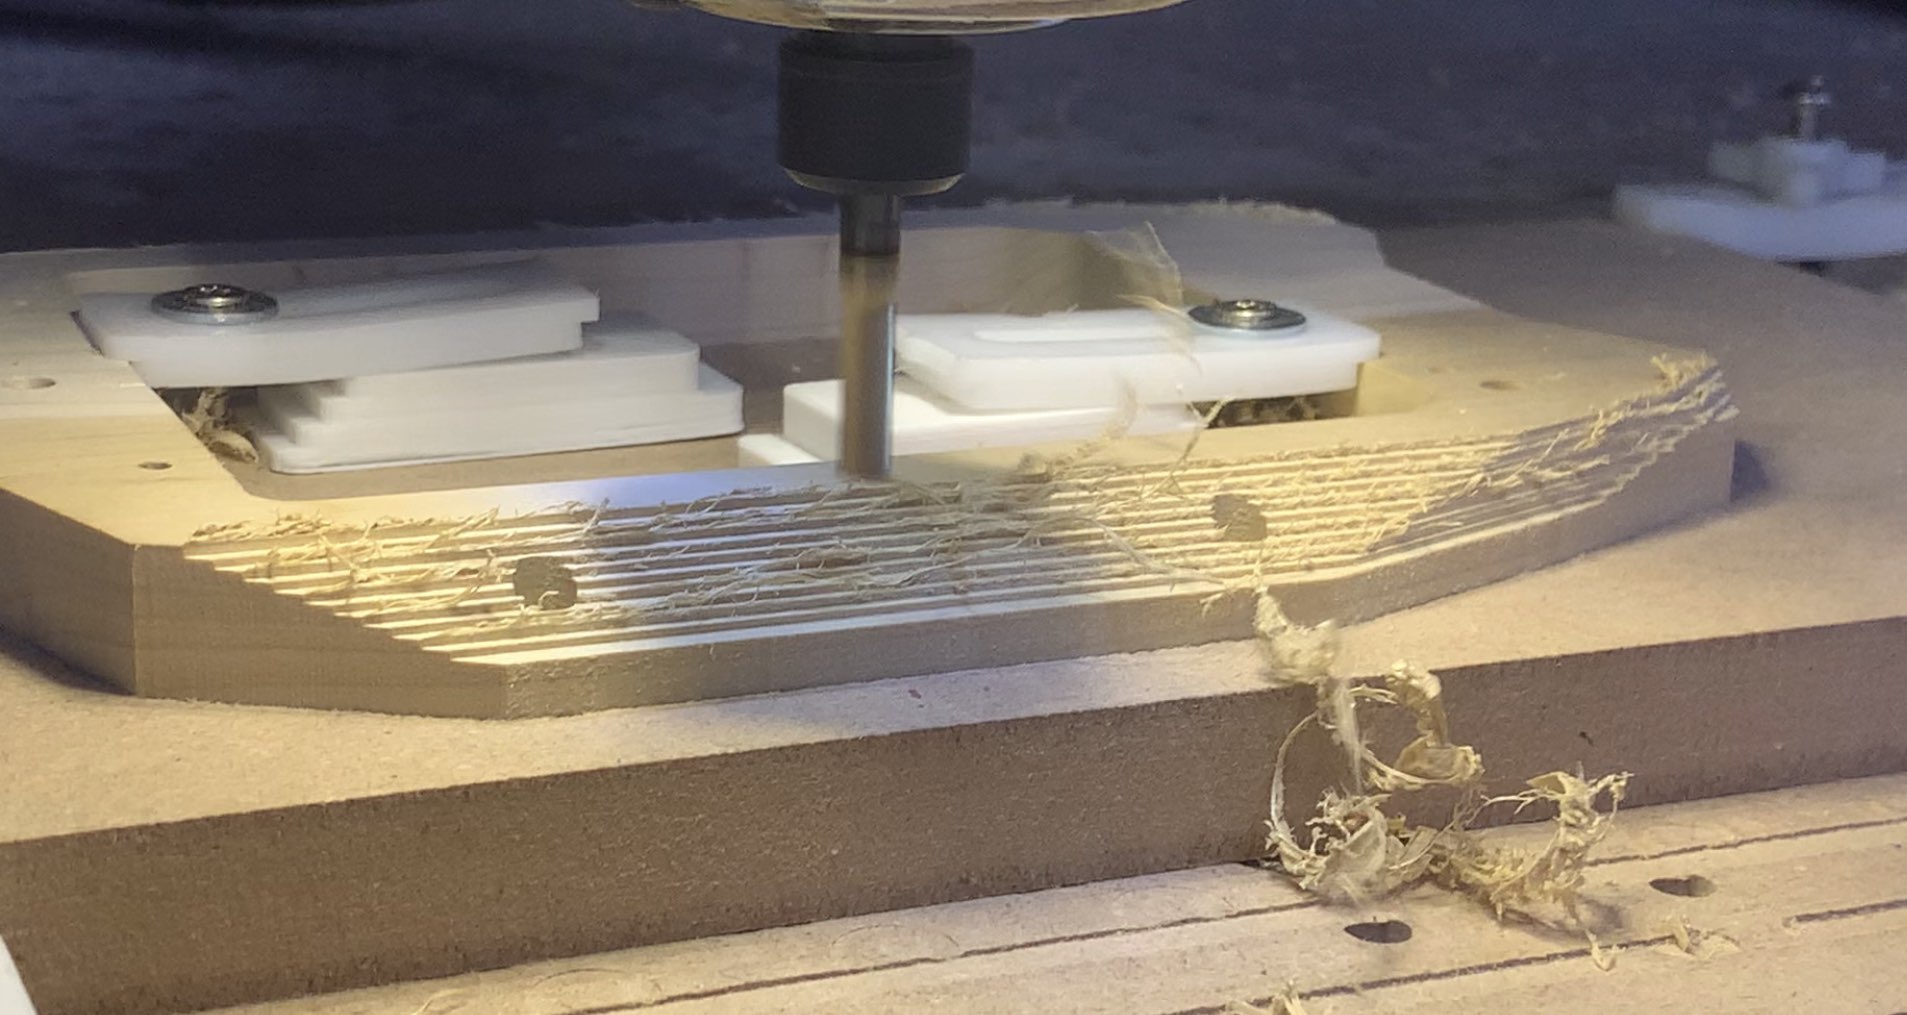
The CNC job is split into two parts, the roughing and finishing cuts. The image above is the CNC router doing roughing cuts with a large square end mill. Stepover in the roughing cuts can be large, since the main job of the roughing cuts is to quickly remove material. The finishing cuts are done with a smaller diameter ball end mill. Finishing cuts are done with a smaller diameter ball end mill to create 3D surfaces that are unable to be cut with a square end mill. Some of the wood parts that I had to machine on the CNC router were difficult to do, because I had to flip some of them around and machine two opposite sides of the wood stock. In order to machine the opposite side of some parts, I had to first create a fixture plate that I could mount the stock to. The fixture plate is important since it allows me to precisely attach the wood stock to the CNC router and keep the coordinate system.

After some light sanding, the battery enclosure looked like this. The cnc router did a good job of making smooth flat surfaces that were easy to sand. After sanding, I applied several coats of clear spray coating to add durability and waterproof the wood. Hopefully, this enclosure is durable enough to last a long time.
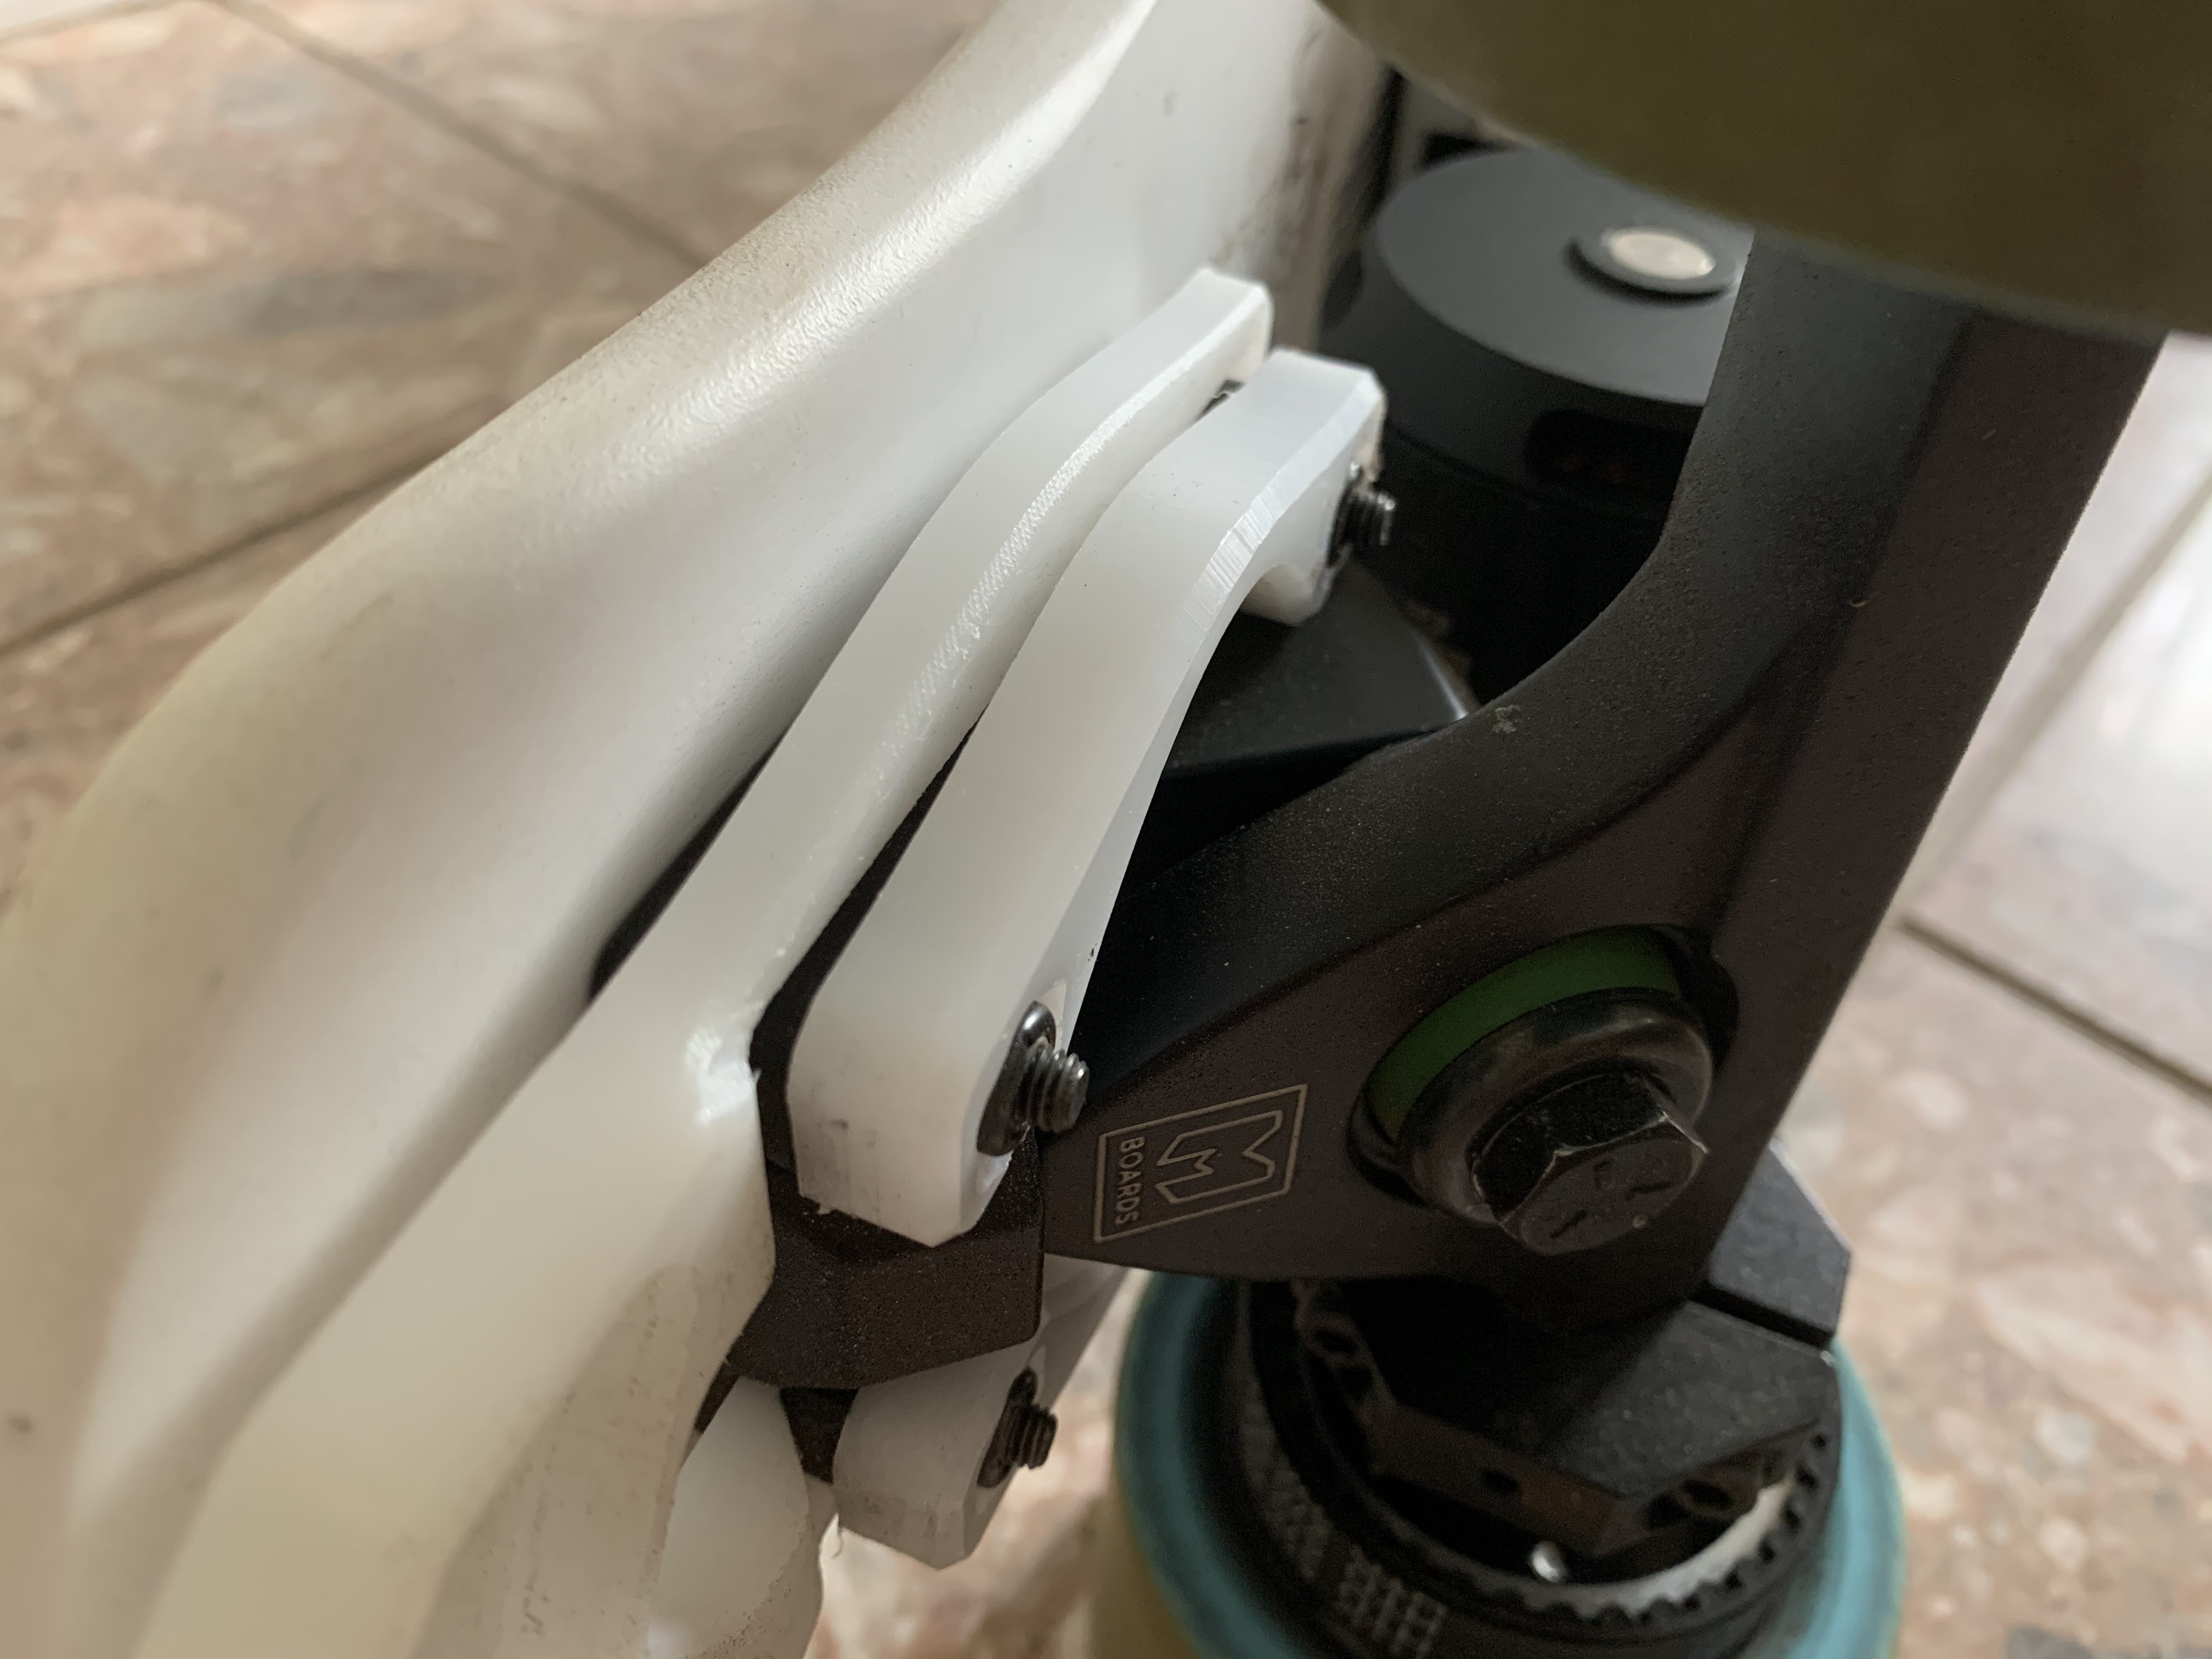
I also machined a couple parts out of HDPE plate. First is the rear kick tail bash guard. I don’t want to damage the deck every time I kick up the skateboard, so I designed a bash guard to hit the ground instead of the deck. I also designed some captured nut holders that the truck mounting nuts can slide into. The captured nut holders eliminate the need for me to bring around a wrench in case the nuts get loose. Both the esc and battery enclosure also have HDPE bottom plates that were machined to fit the curve of the deck.
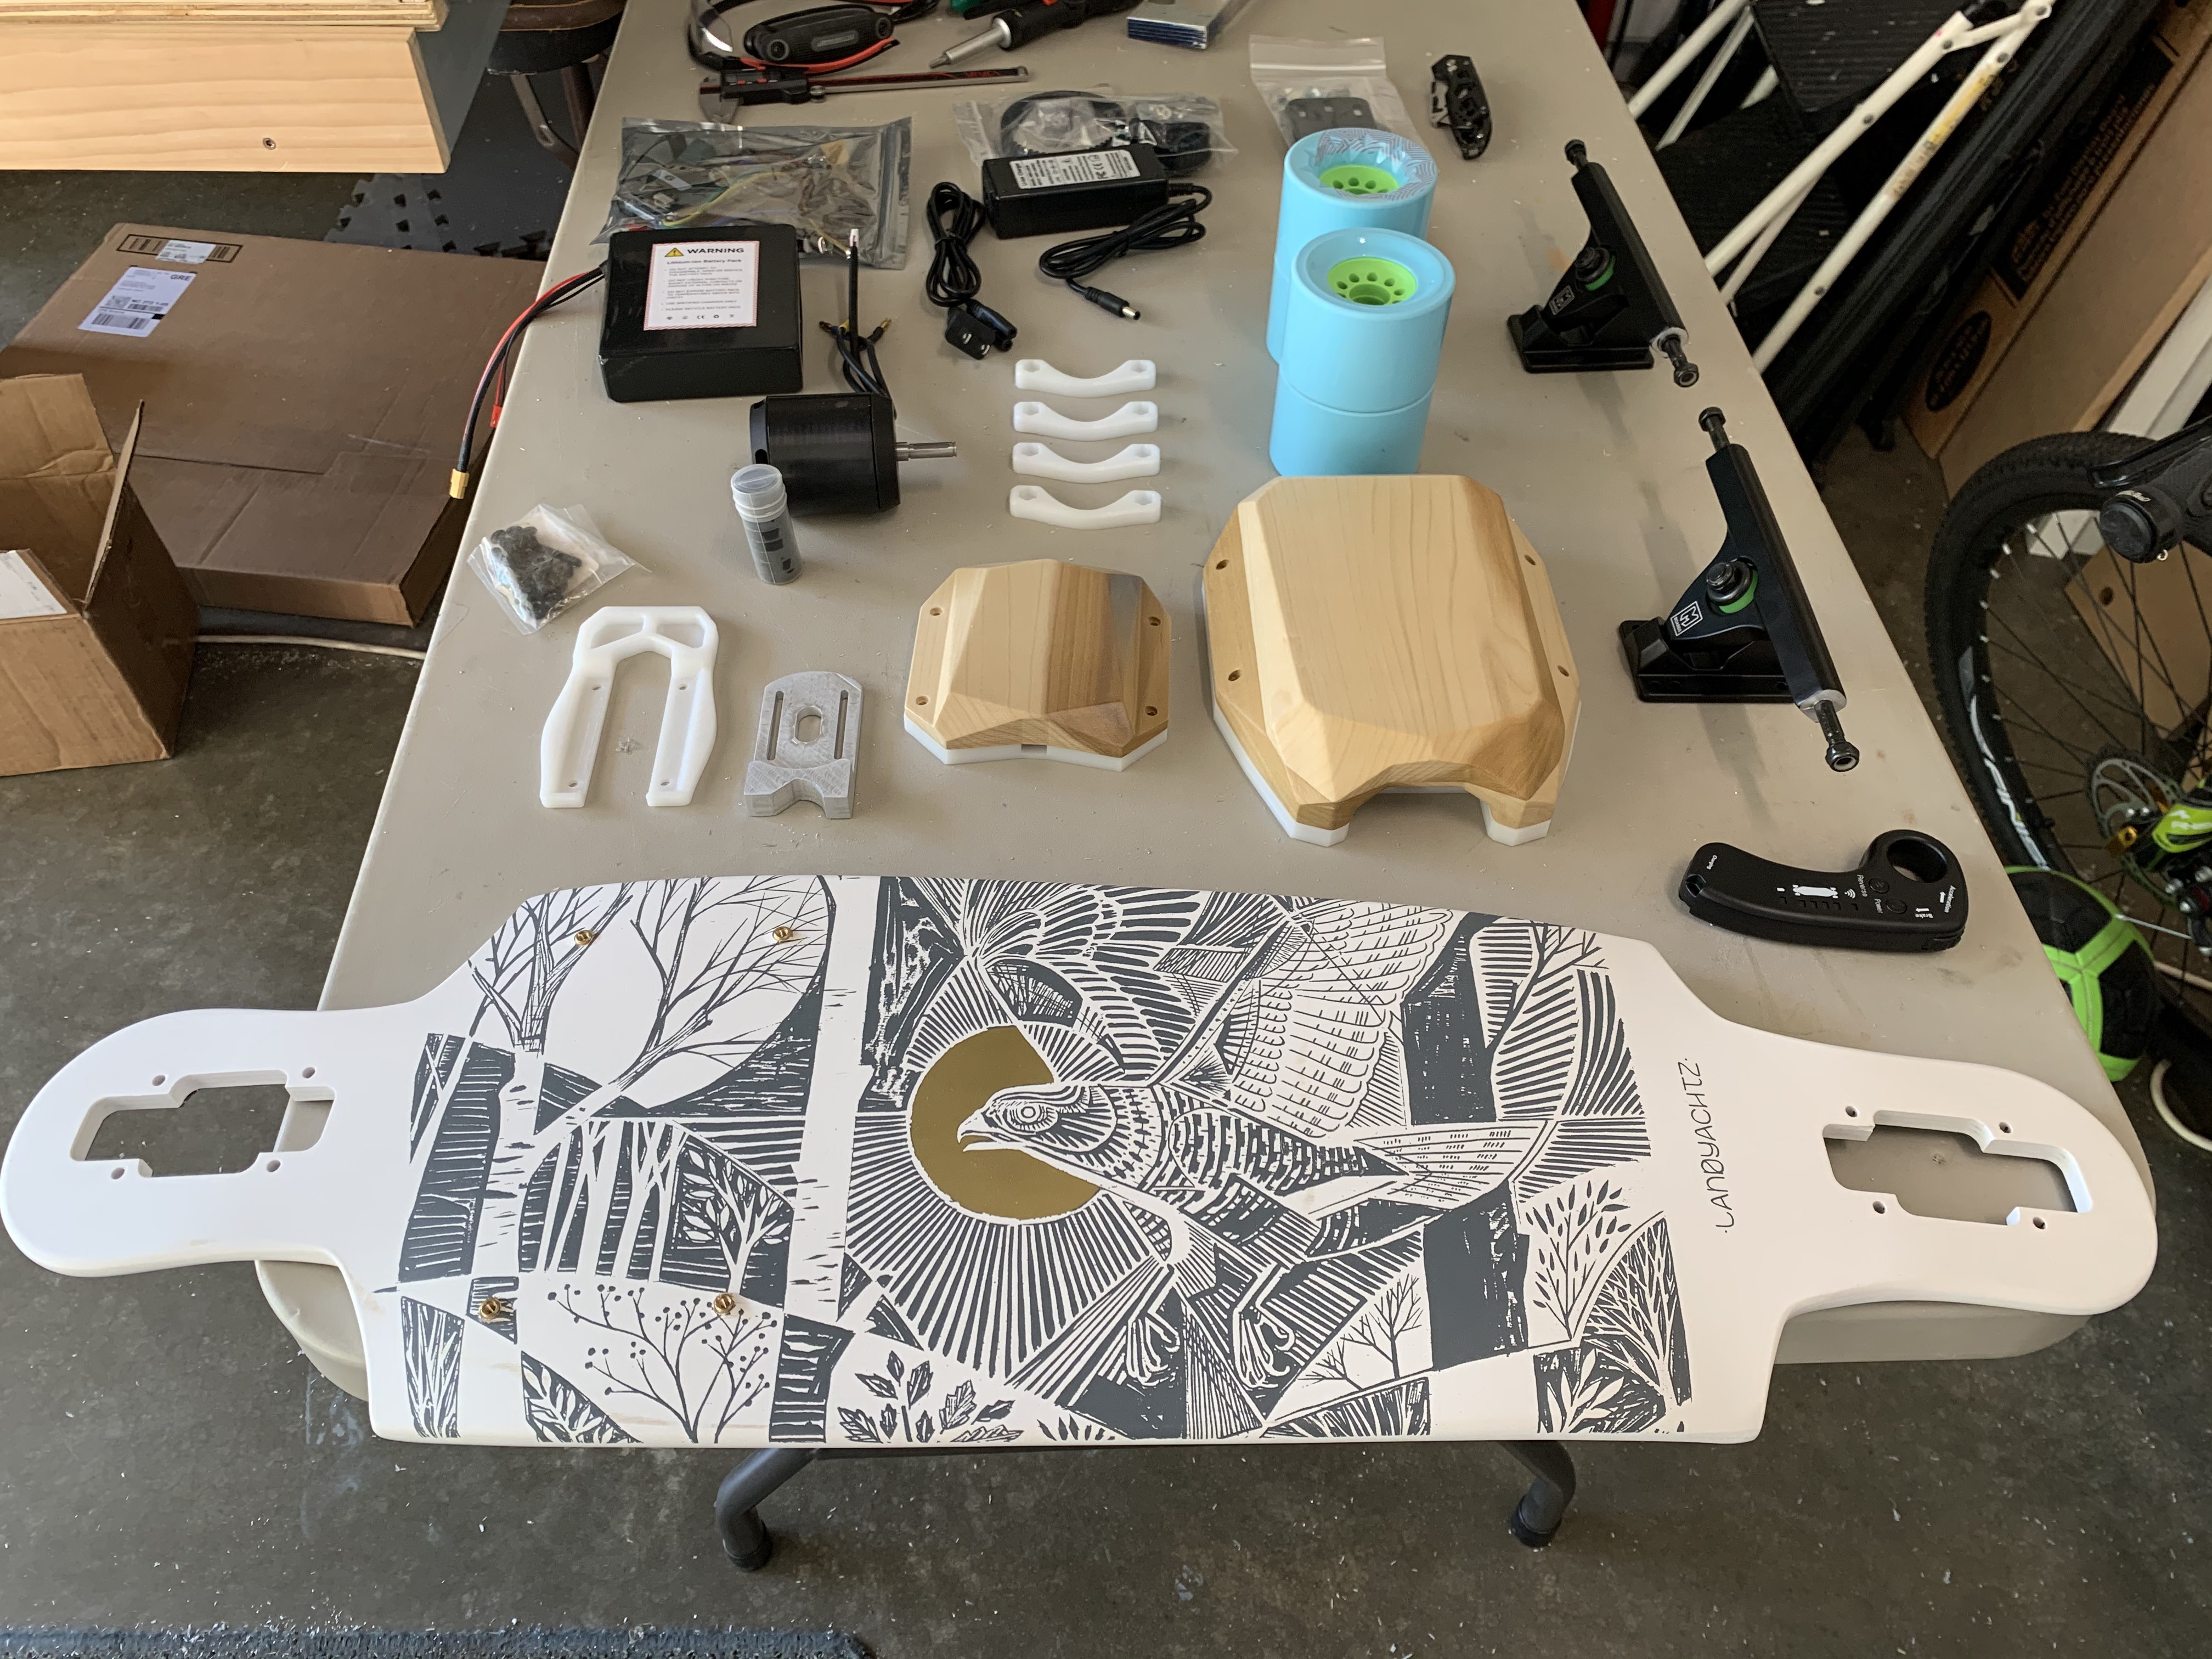
I had to drill some holes into the deck to attach some brass screw inserts. After making sure that the spacing was right, I glued the inserts into the holes in the deck using two-part epoxy. Assembly was very simple as it was just screwing parts down to the deck. I had to solder a few new connectors to connect the battery, esc and motor together.
This was a quick summary of my first electric skateboard build. I had some fun designing parts to be machined on a CNC router. Now I just need to learn how to ride a skateboard.
Skills Enhanced
- CAD (PTC Creo Paramtric)
- CAM (Fusion 360)
- CNC Routing